| (48 intermediate revisions by 2 users not shown) | |||
| Line 1: | Line 1: | ||
| − | {{icons|oou}} |
+ | {{icons|s1|oou}} |
| + | {{DISPLAYTITLE:Weapons on ''24''/Season 1}} |
||
| − | {{pna-incomplete}} |
||
{{weapons}} |
{{weapons}} |
||
This article lists '''weapons''' seen in [[Season 1]] of ''[[24]]''. |
This article lists '''weapons''' seen in [[Season 1]] of ''[[24]]''. |
||
| + | |||
| − | =Firearms= |
||
==Handguns== |
==Handguns== |
||
===Beretta 92=== |
===Beretta 92=== |
||
| − | :''Main section: [[ |
+ | :''Main section: [[Handguns on 24#Beretta 92|Beretta 92]]'' |
{| class="fancy left top" style="font-size:84%;float:left;" |
{| class="fancy left top" style="font-size:84%;float:left;" |
||
|- |
|- |
||
| Line 17: | Line 17: | ||
| [[File:1x02 Beretta.jpg|100px]] |
| [[File:1x02 Beretta.jpg|100px]] |
||
| {{ep|1x02s}} |
| {{ep|1x02s}} |
||
| − | | [[ |
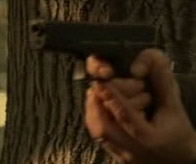
+ | | [[Gaines' thug|Gaines' henchman]] pointed a Beretta at [[Bridgit]]'s head when she refused to give him the keycard. |
|- |
|- |
||
| [[File:1x03 Beretta.jpg|100px]] |
| [[File:1x03 Beretta.jpg|100px]] |
||
| Line 37: | Line 37: | ||
| [[File:B92_1x08.jpg|100px]] |
| [[File:B92_1x08.jpg|100px]] |
||
| {{ep|1x08s}}<br>{{ep|1x09s}}<br>{{ep|1x12s}}<br>{{ep|1x13s}} |
| {{ep|1x08s}}<br>{{ep|1x09s}}<br>{{ep|1x12s}}<br>{{ep|1x13s}} |
||
| − | | [[Neil Nagi]] used a Beretta 92FS as his sidearm, nearly executing [[Teri Bauer|Teri]] and [[Kim Bauer]] after Jack interrupts the assassination attempt against [[David Palmer]]. He kept it in the back of his trousers during the following |
+ | | [[Neil Nagi]] used a Beretta 92FS as his sidearm, nearly executing [[Teri Bauer|Teri]] and [[Kim Bauer]] after Jack interrupts the assassination attempt against [[David Palmer]]. He kept it in the back of his trousers during the following episode, before using it to raid the "guest house" with Gaines. He then used it to shoot at the van, and later, used when hunting the Bauer women before being shot. |
|- class="odd" |
|- class="odd" |
||
| − | | [[File:B92_1x13.jpg|100px]] |
+ | | [[File:1x12 Beretta.jpg|100px]]<br><br>[[File:B92_1x13.jpg|100px]] |
| {{ep|1x08s}}<br>{{ep|1x09s}}<br>{{ep|1x11s}}<br>{{ep|1x12s}}<br>{{ep|1x13s}} |
| {{ep|1x08s}}<br>{{ep|1x09s}}<br>{{ep|1x11s}}<br>{{ep|1x12s}}<br>{{ep|1x13s}} |
||
| − | | [[Eli Stram]] used a similar Beretta 92FS during the near-execution of the Bauer women. When he |
+ | | [[Eli Stram]] used a similar Beretta 92FS during the near-execution of the Bauer women. When he returned to execute them again in {{ep|1x11s|,}} Teri managed to steal the gun from him and shot him twice in the chest. During the escape, Jack took the Beretta from her and briefly used it while shooting at the mercenaries from behind the van, before giving it back to Teri and telling her to flee with Kim. Teri used it for the remainder of the escape, nearly having to shoot Neil when he discovered their hiding place. |
|- |
|- |
||
| [[File:1x09 Beretta.jpg|100px]] |
| [[File:1x09 Beretta.jpg|100px]] |
||
| Line 55: | Line 55: | ||
| [[Newman]] and his [[Superior Alarm]] colleague both carried Berettas when responding to the alarm call at the [[Bauer house]]. |
| [[Newman]] and his [[Superior Alarm]] colleague both carried Berettas when responding to the alarm call at the [[Bauer house]]. |
||
|- class="odd" |
|- class="odd" |
||
| − | | [[File:1x19 Beretta 2.jpg|100px]] |
||
| − | | {{ep|1x19s}} |
||
| − | | [[Chris (Day 1)|Chris]] carried a Beretta for protecting [[Teri Bauer]], but she panicked at the sight of the gun and asked him to wait outside. Later, he tried to draw the gun when he saw [[Jovan Myovic]] but Myovic was too quick and killed him. |
||
| − | |- |
||
| [[File:1x19 Beretta 3.jpg|100px]] |
| [[File:1x19 Beretta 3.jpg|100px]] |
||
| {{ep|1x19s}} |
| {{ep|1x19s}} |
||
| A masked SWAT team member used a Beretta to shoot and kill an accomplice of [[Frank Allard]] and [[Craig (Day 1)|Craig]]. |
| A masked SWAT team member used a Beretta to shoot and kill an accomplice of [[Frank Allard]] and [[Craig (Day 1)|Craig]]. |
||
| − | |- class="odd" |
||
| − | | [[File:1x20 Beretta.jpg|100px]] |
||
| − | | {{ep|1x20s}}<br>{{ep|1x21s}} |
||
| − | | All the police officers at the station Kim was brought to carried Berettas as their side arms. |
||
|- |
|- |
||
| [[File:1x22 Beretta.jpg|100px]] |
| [[File:1x22 Beretta.jpg|100px]] |
||
| − | | {{ep|1x22s}} |
+ | | {{ep|1x22s}}<br>{{ep|1x23s}} |
| − | | When [[Jack Bauer]] took [[Mila Luminović]] hostage at knife point, |
+ | | When [[Jack Bauer]] took [[Mila Luminović]] hostage at knife point, [[Boris]] pulled out a Beretta. He lowered it after Jack ordered them to. He later carried it after [[Kim Bauer]] escaped from captivity at [[Dock 11A]]. |
| + | |- class="odd" |
||
| + | | [[File:1x23 Beretta.jpg|100px]] |
||
| + | | {{ep|1x23s}} |
||
| + | | After the bombing at the [[Palmer campaign hotel]], a Secret Service agent pulled a Beretta pistol. |
||
|} |
|} |
||
{{-}} |
{{-}} |
||
| − | |||
===Glock 17=== |
===Glock 17=== |
||
| − | :''Main section: [[ |
+ | :''Main section: [[Handguns on 24#Glock 17|Glock 17]]'' |
{| class="fancy left top" style="font-size:84%;float:left;" |
{| class="fancy left top" style="font-size:84%;float:left;" |
||
|- |
|- |
||
| Line 87: | Line 82: | ||
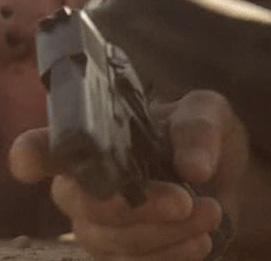
| [[Greg Penticoff]] shot at [[Jack Bauer]] and [[Jessie Hampton]] with a Glock 17 at [[18166 San Fernando Road]], and used it to take Hampton hostage. |
| [[Greg Penticoff]] shot at [[Jack Bauer]] and [[Jessie Hampton]] with a Glock 17 at [[18166 San Fernando Road]], and used it to take Hampton hostage. |
||
|- |
|- |
||
| − | | [[File:G17_1x12.jpg|100px]] |
+ | | [[File:1x09 glock.jpg|100px]]<br><br>[[File:G17_1x12.jpg|100px]] |
| {{ep|1x08s}}<br>{{ep|1x09s}}<br>{{ep|1x11s}}<br>{{ep|1x12s}}<br>{{ep|1x13s}} |
| {{ep|1x08s}}<br>{{ep|1x09s}}<br>{{ep|1x11s}}<br>{{ep|1x12s}}<br>{{ep|1x13s}} |
||
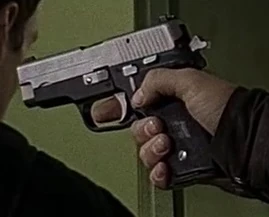
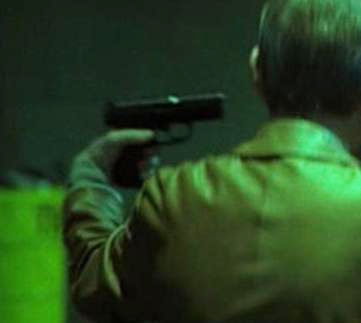
| [[Secret Service]] agent [[Alan Hayes]] carried a Glock 17, which [[Jack Bauer]] made a grab for to get [[David Palmer]] out of the [[Santa Clarita Power Plant]]. Later, as Jack was being transferred to [[FBI]] custody, he took the gun and used it to carjack and hold hostage [[Lauren Proctor]]. He tucked it into his trousers when interrogating [[Ted Cofell]]. The handgun reappeared during the Bauers' escape from [[Gaines compound|Gaines' base]], where Jack fired both the Glock and [[Eli Stram]]'s [[#Beretta 92|Beretta 92FS]] in addition to the [[#SIG Sauer P229|P229]]. He kept hold of the gun, using it to shoot at [[Neil Nagi]], but dropped it when it ran out of ammo. |
| [[Secret Service]] agent [[Alan Hayes]] carried a Glock 17, which [[Jack Bauer]] made a grab for to get [[David Palmer]] out of the [[Santa Clarita Power Plant]]. Later, as Jack was being transferred to [[FBI]] custody, he took the gun and used it to carjack and hold hostage [[Lauren Proctor]]. He tucked it into his trousers when interrogating [[Ted Cofell]]. The handgun reappeared during the Bauers' escape from [[Gaines compound|Gaines' base]], where Jack fired both the Glock and [[Eli Stram]]'s [[#Beretta 92|Beretta 92FS]] in addition to the [[#SIG Sauer P229|P229]]. He kept hold of the gun, using it to shoot at [[Neil Nagi]], but dropped it when it ran out of ammo. |
||
| Line 111: | Line 106: | ||
| The [[DEA]] agents that entered [[1804 Glade]] carried Glock 17 pistols. |
| The [[DEA]] agents that entered [[1804 Glade]] carried Glock 17 pistols. |
||
|- |
|- |
||
| + | | [[File:1x20 Beretta.jpg|100px]] |
||
| + | | {{ep|1x20s}}<br>{{ep|1x21s}} |
||
| + | | All the police officers at the station Kim was brought to carried Glocks as their side arms. |
||
| + | |- class="odd" |
||
| [[File:1x22 Glock.jpg|100px]] |
| [[File:1x22 Glock.jpg|100px]] |
||
| {{ep|1x22s}} |
| {{ep|1x22s}} |
||
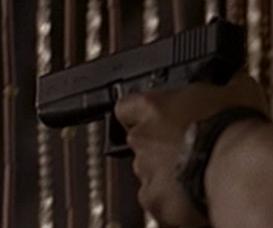
| When [[Jack Bauer]] held [[Mila Luminović]] hostage at knife point, [[Marko]] and another man drew Glock pistols and aimed them towards Jack. They lowered them on Jack's order. |
| When [[Jack Bauer]] held [[Mila Luminović]] hostage at knife point, [[Marko]] and another man drew Glock pistols and aimed them towards Jack. They lowered them on Jack's order. |
||
| + | |- |
||
| − | |- class="odd" |
||
| [[File:1x24 Glock.jpg|100px]] |
| [[File:1x24 Glock.jpg|100px]] |
||
| {{ep|1x24s}} |
| {{ep|1x24s}} |
||
| − | | When [[Nina Myers]] was planning her extraction from [[CTU Los Angeles]], she pulled out a silenced Glock and killed a [[ |
+ | | When [[Nina Myers]] was planning her extraction from [[CTU Los Angeles]], she pulled out a silenced Glock and killed a [[IT_woman|CTU worker]]. She later used the gun to threaten and kill [[Teri Bauer]], kill two CTU security guards, and shoot at [[Jack Bauer]] in the parking lot. She lost the gun when apprehended by Jack. |
|} |
|} |
||
{{-}} |
{{-}} |
||
| − | |||
===Glock 19=== |
===Glock 19=== |
||
| − | :''Main section: [[ |
+ | :''Main section: [[Handguns on 24#Glock 19|Glock 19]]'' |
{| class="fancy left top" style="font-size:84%;float:left;" |
{| class="fancy left top" style="font-size:84%;float:left;" |
||
|- |
|- |
||
| Line 129: | Line 127: | ||
| [[File:G19_1x14.jpg|100px]] |
| [[File:G19_1x14.jpg|100px]] |
||
| {{ep|1x14s}} |
| {{ep|1x14s}} |
||
| − | | [[Alexis Drazen]] |
+ | | [[Alexis Drazen]] used a Glock 19 to execute [[Kevin Carroll]] after wiping out the rest of his team. |
|} |
|} |
||
{{-}} |
{{-}} |
||
| − | |||
===Heckler & Koch USP=== |
===Heckler & Koch USP=== |
||
| − | :''Main section: [[ |
+ | :''Main section: [[Handguns on 24#Heckler & Koch USP|Heckler & Koch USP]]'' |
{| class="fancy left top" style="font-size:84%;float:left;" |
{| class="fancy left top" style="font-size:84%;float:left;" |
||
|- |
|- |
||
| Line 144: | Line 141: | ||
|- class="odd" |
|- class="odd" |
||
| [[File:USP_1x19.jpg|100px]] |
| [[File:USP_1x19.jpg|100px]] |
||
| − | | {{ep|1x16s}}<br>{{ep|1x18s}}<br>{{ep|1x19s}} |
+ | | {{ep|1x14s}}<br>{{ep|1x16s}}<br>{{ep|1x18s}}<br>{{ep|1x19s}} |
| − | | [[Jovan Myovic]] |
+ | | [[Jovan Myovic]] wielded a suppressed USP Tactical during the raid on the Bauers' safehouse with [[Mishko Suba]], using it to shoot and fatally wound [[Ted Paulson]]. Later, he used it to attack [[Teri Bauer]] at her home, killing [[Williams (CTU)|Williams]] and [[Chris (Day 1)|Chris]] and wounding [[Phil Parslow]] before [[Tony Almeida]] shot him. |
|- |
|- |
||
| [[File:1x21 USP.jpg|100px]] |
| [[File:1x21 USP.jpg|100px]] |
||
| Line 153: | Line 150: | ||
| [[File:USP_1x24.jpg|100px]] |
| [[File:USP_1x24.jpg|100px]] |
||
| {{ep|1x24s}} |
| {{ep|1x24s}} |
||
| − | | [[Jack Bauer]] |
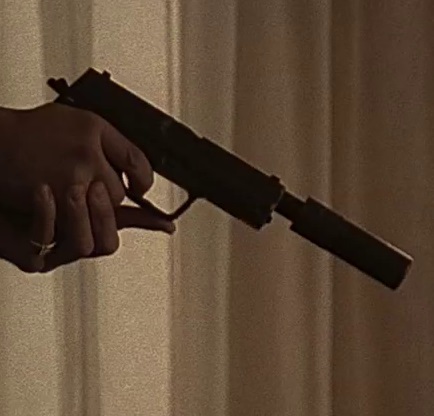
+ | | [[Jack Bauer]] used a pair of USPs during the shootout against the Drazens at the [[Port of Los Angeles]], using them to kill [[Marko]] and [[Andre Drazen]] along with reportedly four others. After [[Victor Drazen]] surrendered himself, Jack killed him, firing the remaining bullets in one of the USPs until his magazine was empty. |
| − | |} |
||
| − | {{-}} |
||
| − | |||
| − | ===Heckler & Koch P2A1=== |
||
| − | :''Main section: [[Weapons on 24#Heckler & Koch P2A1|Heckler & Koch P2A1]]'' |
||
| − | {| class="fancy left top" style="font-size:84%;float:left;" |
||
| − | |- |
||
| − | ! style="width:75px;" | Image !! style="width:100px;" | Episode(s) !! Description |
||
| − | |- |
||
| − | | [[File:1x16 P2A1.jpg|100px]] |
||
| − | | {{ep|1x16s}} |
||
| − | | When invading the [[23033 Pine Canyon]] safe house, [[Jovan Myovic]] killed [[Jeff Breeher]] with a bolt loaded into a Heckler & Koch P2A1 flare gun. |
||
|} |
|} |
||
{{-}} |
{{-}} |
||
===Jericho 941=== |
===Jericho 941=== |
||
| − | :''Main section: [[ |
+ | :''Main section: [[Handguns on 24#Jericho 941|Jericho 941]]'' |
{| class="fancy left top" style="font-size:84%;float:left;" |
{| class="fancy left top" style="font-size:84%;float:left;" |
||
|- |
|- |
||
| Line 177: | Line 162: | ||
| [[File:J941_1x08.jpg|100px]] |
| [[File:J941_1x08.jpg|100px]] |
||
| {{ep|1x08s}}<br>{{ep|1x09s}} |
| {{ep|1x08s}}<br>{{ep|1x09s}} |
||
| − | | [[Tony Almeida]] |
+ | | [[Tony Almeida]] used a Jericho 941 to apprehend Jamey in CTU's restroom and get her out before [[Ira Gaines]] noticed on the surveillance camera. |
|} |
|} |
||
{{-}} |
{{-}} |
||
| − | |||
===Magnum Research Lone Eagle=== |
===Magnum Research Lone Eagle=== |
||
| − | :''Main section: [[ |
+ | :''Main section: [[Handguns on 24#Magnum Research Lone Eagle|Magnum Research Lone Eagle]]'' |
{| class="fancy left top" style="font-size:84%;float:left;" |
{| class="fancy left top" style="font-size:84%;float:left;" |
||
|- |
|- |
||
| Line 189: | Line 173: | ||
| [[File:MRLE_1x08.jpg|100px]] |
| [[File:MRLE_1x08.jpg|100px]] |
||
| {{ep|1x08s}} |
| {{ep|1x08s}} |
||
| − | | [[Ira Gaines]] |
+ | | [[Ira Gaines]] ordered [[Jack Bauer]] to smuggle a Magnum Research Lone Eagle, chambered in an unknown rifle caliber, into the breakfast at the [[Santa Clarita Power Plant]], concealed in a briefcase underneath a laptop. He assembled the single-shot pistol for [[Jonathan Matijevich]], ensuring that his fingerprints would be found on the weapon and incriminate him for the assassination of [[David Palmer]]. |
|} |
|} |
||
{{-}} |
{{-}} |
||
| − | |||
===SIG Sauer P226=== |
===SIG Sauer P226=== |
||
| − | :''Main section: [[ |
+ | :''Main section: [[Handguns on 24#SIG Sauer P226|SIG Sauer P226]]'' |
{| class="fancy left top" style="font-size:84%;float:left;" |
{| class="fancy left top" style="font-size:84%;float:left;" |
||
|- |
|- |
||
| Line 200: | Line 183: | ||
|- |
|- |
||
| [[File:P226_1x14.jpg|100px]] |
| [[File:P226_1x14.jpg|100px]] |
||
| − | | |
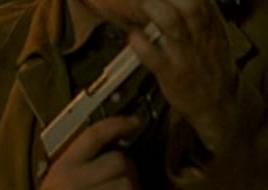
+ | | {{ep|1x14s}} |
| − | | [[Kevin Carroll]] |
+ | | When [[Kevin Carroll]] reached the extraction point after escaping the [[Gaines compound]], he saw [[Andre Drazen]] watching him from the bluff. He drew his SIG P226, but was knocked down by the shack exploding, allowing Drazen to approach and kick the SIG out of reach. |
| + | |- class="odd" |
||
| + | | [[File:1x19 Chris gun.jpg|100px]] |
||
| + | | {{ep|1x19s}} |
||
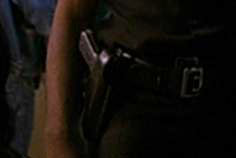
| + | | [[Chris (Day 1)|Chris]] carried a SIG Sauer pistol for protecting [[Teri Bauer]], but she panicked at the sight of the gun and asked him to wait outside. Later, he tried to draw the gun when he saw [[Jovan Myovic]] but Myovic was too quick and killed him. |
||
| + | |- |
||
| + | | [[File:1x20 Andre SIG.jpg|100px]] |
||
| + | | {{ep|1x20s}}<br>{{ep|1x21s}} |
||
| + | | [[Andre Drazen]] had a SIG Sauer P226 during the raid on the [[Saugus detention center]], and shot and killed [[Mark DeSalvo]] with the gun. |
||
|} |
|} |
||
{{-}} |
{{-}} |
||
| − | |||
===SIG Sauer P228=== |
===SIG Sauer P228=== |
||
| − | :''Main section: [[ |
+ | :''Main section: [[Handguns on 24#SIG Sauer P228|SIG Sauer P228]]'' |
{| class="fancy left top" style="font-size:84%;float:left;" |
{| class="fancy left top" style="font-size:84%;float:left;" |
||
|- |
|- |
||
! style="width:75px;" | Image !! style="width:100px;" | Episode(s) !! Description |
! style="width:75px;" | Image !! style="width:100px;" | Episode(s) !! Description |
||
|- |
|- |
||
| − | | [[File: |
+ | | [[File:1x02 P228.jpg|100px]]<br><br>[[File:SigSauer.jpg|100px]] |
| − | | {{ep|1x02s}}<br>{{ep|1x07s}}<br>{{ep|1x08s}}<br>{{ep| |
+ | | {{ep|1x02s}}<br>{{ep|1x07s}}<br>{{ep|1x08s}}<br>{{ep|1x09s}} |
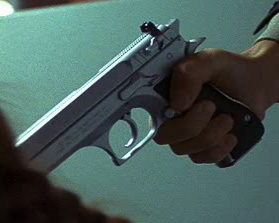
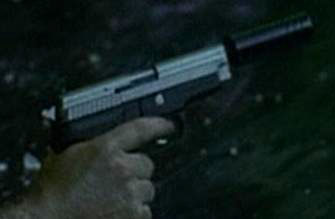
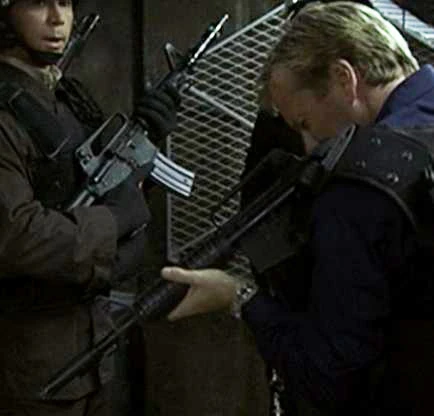
| Beginning in {{ep|1x02s}} and for most of the season, [[Jack Bauer]] uses a two-tone nickel-plated '''P228''' as his sidearm of choice, both with and without a suppressor. Notable appearances include: |
| Beginning in {{ep|1x02s}} and for most of the season, [[Jack Bauer]] uses a two-tone nickel-plated '''P228''' as his sidearm of choice, both with and without a suppressor. Notable appearances include: |
||
* The exterior scenes of rescuing [[Richard Walsh]] from [[2350 Dunlop Plaza]], in the North Parking Garage ({{ep|1x02s}}) |
* The exterior scenes of rescuing [[Richard Walsh]] from [[2350 Dunlop Plaza]], in the North Parking Garage ({{ep|1x02s}}) |
||
* Kidnapping [[Nina Myers]] from CTU and shooting her for [[Ira Gaines]] ({{ep|1x07s}}) |
* Kidnapping [[Nina Myers]] from CTU and shooting her for [[Ira Gaines]] ({{ep|1x07s}}) |
||
* Threatening [[Jonathan]] at the [[Santa Clarita Power Plant]] breakfast ({{ep|1x08s}}) |
* Threatening [[Jonathan]] at the [[Santa Clarita Power Plant]] breakfast ({{ep|1x08s}}) |
||
| + | He lost the gun to [[Frank Simes]] when he was arrested by [[Secret Service]]. |
||
| − | * Interrogating [[Ted Cofell]] in the back of his limousine ({{ep|1x11s}}) |
||
| + | |- class="odd" |
||
| − | * Holding [[Victor Drazen]] hostage during the standoff with Andre's team ({{ep|1x21s}}) |
||
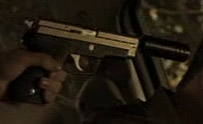
| + | | [[File:1x11 P228.jpg|100px]] |
||
| − | After the Drazens take Jack hostage, [[Victor Drazen]] appropriates Jack's P228 for his own use. He uses it for the remainder of the season, notably to kill [[Mila Luminović|Mila]] and [[Nikola Luminović]] at their restaurant ({{ep|1x22s}}), and during the final shootout with Jack at the [[Port of Los Angeles]]. ({{ep|1x24s}}) |
||
| + | | {{ep|1x10s}}<br>{{ep|1x11s}}<br>{{ep|1x13s}} |
||
| + | | After escaping from [[Secret Service]] custody, [[Nina Myers]] sent Jack a car with a "care package" containing another SIG Sauer P228. Jack loaded the gun with 9mm ammunition before setting off, and then later used the gun to kidnap and threaten [[Ted Cofell]]. He then used it after rescuing his family, to kill [[Neil Nagi]] and [[Ira Gaines]], before surrendering it to [[Bundy]] and his team. |
||
| + | |- |
||
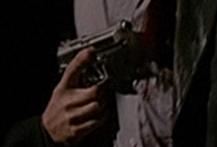
| + | | [[File:P228_1x22.jpg|100px]] |
||
| + | | {{ep|1x20s}}<br>{{ep|1x21s}}<br>{{ep|1x22s}}<br>{{ep|1x23s}}<br>{{ep|1x24s}} |
||
| + | | Jack took another SIG Sauer P228 when investigating [[21911 Kipling Avenue]], which was taken by [[Mark DeSalvo]]. DeSalvo gave the gun back to Jack, who used it when transporting [[Victor Drazen]] out of the facility. He then used it to hold Drazen hostage, but Victor appropriated it for himself. Drazen used the gun to kill [[Mila Luminović|Mila]] and [[Nikola Luminović]] at their restaurant ({{ep|1x22s}}), and during the final shootout with Jack at the [[Port of Los Angeles]]. ({{ep|1x24s}}) |
||
|} |
|} |
||
{{-}} |
{{-}} |
||
===SIG Sauer P229=== |
===SIG Sauer P229=== |
||
| − | :''Main section: [[ |
+ | :''Main section: [[Handguns on 24#SIG Sauer P229|SIG Sauer P229]]'' |
{| class="fancy left top" style="font-size:84%;float:left;" |
{| class="fancy left top" style="font-size:84%;float:left;" |
||
|- |
|- |
||
! style="width:75px;" | Image !! style="width:100px;" | Episode(s) !! Description |
! style="width:75px;" | Image !! style="width:100px;" | Episode(s) !! Description |
||
|- |
|- |
||
| − | | [[File:P229 1x04.jpg|100px]] |
+ | | [[File:1x02 P229.jpg|100px]]<br><br>[[File:P229 1x04.jpg|100px]] |
| {{ep|1x02s}}<br>{{ep|1x04s}}<br>{{ep|1x05s}} |
| {{ep|1x02s}}<br>{{ep|1x04s}}<br>{{ep|1x05s}} |
||
| In a possible continuity error, the P228 Jack uses during the early part of the season occasionally changes to a P229. Notable appearances include: |
| In a possible continuity error, the P228 Jack uses during the early part of the season occasionally changes to a P229. Notable appearances include: |
||
| − | |||
* The interior and rooftop scenes at [[2350 Dunlop Plaza]] ({{ep|1x02s}}) |
* The interior and rooftop scenes at [[2350 Dunlop Plaza]] ({{ep|1x02s}}) |
||
* Chasing [[Greg Penticoff]] at [[18166 San Fernando Road]] with [[Jessie Hampton]] ({{ep|1x04s}}) |
* Chasing [[Greg Penticoff]] at [[18166 San Fernando Road]] with [[Jessie Hampton]] ({{ep|1x04s}}) |
||
* Holding Penticoff at gunpoint when the body of [[Alan York]] is found ({{ep|1x05s}}) |
* Holding Penticoff at gunpoint when the body of [[Alan York]] is found ({{ep|1x05s}}) |
||
| − | |||
|- class="odd" |
|- class="odd" |
||
| [[File:P229 1x12.jpg|100px]] |
| [[File:P229 1x12.jpg|100px]] |
||
| {{ep|1x12s}} |
| {{ep|1x12s}} |
||
| Throughout episode 12, Jack's pistol is a P229, despite him carrying a P228 in the preceding and following episode. He used it to force [[Kevin Carroll]] to drive him inside [[Gaines compound|Gaines' base]], and also used it with a silencer to locate and rescue Teri and Kim. |
| Throughout episode 12, Jack's pistol is a P229, despite him carrying a P228 in the preceding and following episode. He used it to force [[Kevin Carroll]] to drive him inside [[Gaines compound|Gaines' base]], and also used it with a silencer to locate and rescue Teri and Kim. |
||
| − | |||
|} |
|} |
||
{{-}} |
{{-}} |
||
| − | |||
===Smith & Wesson 5904=== |
===Smith & Wesson 5904=== |
||
| − | :''Main section: [[ |
+ | :''Main section: [[Handguns on 24#Smith & Wesson 5904|Smith & Wesson 5904]]'' |
{| class="fancy left top" style="font-size:84%;float:left;" |
{| class="fancy left top" style="font-size:84%;float:left;" |
||
|- |
|- |
||
| Line 260: | Line 252: | ||
|} |
|} |
||
{{-}} |
{{-}} |
||
| − | |||
===Smith & Wesson 5906=== |
===Smith & Wesson 5906=== |
||
| − | :''Main section: [[ |
+ | :''Main section: [[Handguns on 24#Smith & Wesson 5906|Smith & Wesson 5906]]'' |
{| class="fancy left top" style="font-size:84%;float:left;" |
{| class="fancy left top" style="font-size:84%;float:left;" |
||
|- |
|- |
||
| Line 268: | Line 259: | ||
|- |
|- |
||
| [[File:SW5906_1x05.jpg|100px]] |
| [[File:SW5906_1x05.jpg|100px]] |
||
| − | | {{ep|1x05s}}<br>{{ep|1x22s}} |
+ | | {{ep|1x05s}}<br>{{ep|1x22s}}<br>{{ep|1x24s}} |
| [[George Mason]]'s sidearm was a Smith & Wesson 5906, first seen when he arrived to arrest [[Jack Bauer]] and [[Greg Penticoff]] in {{ep|1x05s|.}} Mason also pulled the gun to briefly stop [[Serge]] from leaving with [[Alexis Drazen]] in {{ep|1x22s|.}} |
| [[George Mason]]'s sidearm was a Smith & Wesson 5906, first seen when he arrived to arrest [[Jack Bauer]] and [[Greg Penticoff]] in {{ep|1x05s|.}} Mason also pulled the gun to briefly stop [[Serge]] from leaving with [[Alexis Drazen]] in {{ep|1x22s|.}} |
||
|- class="odd" |
|- class="odd" |
||
| Line 277: | Line 268: | ||
| [[File:1x21 S&W 5906.jpg|100px]] |
| [[File:1x21 S&W 5906.jpg|100px]] |
||
| {{ep|1x19s}}<br>{{ep|1x20s}}<br>{{ep|1x21s}} |
| {{ep|1x19s}}<br>{{ep|1x20s}}<br>{{ep|1x21s}} |
||
| − | | [[Krugman]] pulled out a S&W 5906 during the sting operation drug deal with [[Frank Allard]], but quickly put it down when he realized he was outnumbered. He later carried it in his shoulder holster when interrogating [[Kim Bauer]], and when transferring her to a police car. When the car was hit, he tried to draw the weapon but was shot. |
+ | | [[Sam Krugman]] pulled out a S&W 5906 during the sting operation drug deal with [[Frank Allard]], but quickly put it down when he realized he was outnumbered. He later carried it in his shoulder holster when interrogating [[Kim Bauer]], and when transferring her to a police car. When the car was hit, he tried to draw the weapon but was shot. |
|} |
|} |
||
{{-}} |
{{-}} |
||
| + | ===Smith & Wesson SW99=== |
||
| + | :''Main section: [[Handguns on 24#Smith & Wesson SW99|Smith & Wesson SW99]]'' |
||
| + | {| class="fancy left top" style="font-size:84%;float:left;" |
||
| + | |- |
||
| + | ! style="width:75px;" | Image !! style="width:100px;" | Episode(s) !! Description |
||
| + | |- |
||
| + | | [[File:1x24 SW99.jpg|100px]] |
||
| + | | {{ep|1x22s}}<br>{{ep|1x23s}}<br>{{ep|1x24s}} |
||
| + | | [[Andre Drazen]] used a Smith & Wesson SW99 at [[Dock 11A]], when trying to stop [[Kim Bauer]] from escaping. He later used the gun during the final shootout with [[Jack Bauer|Jack]]. |
||
| + | |} |
||
| + | {{-}} |
||
===Taurus PT92=== |
===Taurus PT92=== |
||
| − | :''Main section: [[ |
+ | :''Main section: [[Handguns on 24#Taurus PT92|Taurus PT92]]'' |
{| class="fancy left top" style="font-size:84%;float:left;" |
{| class="fancy left top" style="font-size:84%;float:left;" |
||
|- |
|- |
||
| Line 296: | Line 298: | ||
|} |
|} |
||
{{-}} |
{{-}} |
||
| + | ===Walther PP=== |
||
| − | |||
| + | :''Main section: [[Handguns on 24#Walther PP|Walther PP]]'' |
||
| − | ===Walther PPK=== |
||
| − | :''Main section: [[Weapons on 24#Walther PPK|Walther PPK]]'' |
||
{| class="fancy left top" style="font-size:84%;float:left;" |
{| class="fancy left top" style="font-size:84%;float:left;" |
||
|- |
|- |
||
| Line 305: | Line 306: | ||
| [[File:1x19 Walther PPK.jpg|100px]] |
| [[File:1x19 Walther PPK.jpg|100px]] |
||
| {{ep|1x19s}} |
| {{ep|1x19s}} |
||
| − | | The undercover cop with [[Krugman]] pulled out a Walther PPK during the drug deal, however she too dropped the gun after facing superior firepower. |
+ | | The [[Krugman's_partner|undercover cop]] with [[Krugman]] pulled out a Walther PPK during the drug deal, however she too dropped the gun after facing superior firepower. |
|} |
|} |
||
{{-}} |
{{-}} |
||
| Line 311: | Line 312: | ||
==Rifles== |
==Rifles== |
||
===AK variant=== |
===AK variant=== |
||
| − | :''Main section: [[ |
+ | :''Main section: [[Rifles on 24#AK variant|AK variant]]'' |
{| class="fancy left top" style="font-size:84%;float:left;" |
{| class="fancy left top" style="font-size:84%;float:left;" |
||
|- |
|- |
||
| Line 349: | Line 350: | ||
|} |
|} |
||
{{-}} |
{{-}} |
||
| − | |||
===Colt AR-15=== |
===Colt AR-15=== |
||
| − | :''Main section: [[ |
+ | :''Main section: [[Rifles on 24#Colt AR-15|Colt AR-15]]'' |
{| class="fancy left top" style="font-size:84%;float:left;" |
{| class="fancy left top" style="font-size:84%;float:left;" |
||
|- |
|- |
||
| Line 358: | Line 358: | ||
| [[File:1x18 AR15.jpg|100px]] |
| [[File:1x18 AR15.jpg|100px]] |
||
| {{ep|1x18s}} |
| {{ep|1x18s}} |
||
| − | | [[Teddy Hanlin]] used a suppressed 5.56mm Colt AR-15 rifle to provide backup for [[Jack Bauer]] - and later used it to shoot and kill [[Alan Morgan]]. |
+ | | [[Teddy Hanlin]] used a suppressed 5.56mm Colt AR-15 rifle to provide backup for [[Jack Bauer]] - and later used it to shoot and kill [[Alan Morgan]]. It was a custom design with a free float tube handguard and suppressor attached. |
|} |
|} |
||
{{-}} |
{{-}} |
||
| − | |||
===Colt M16=== |
===Colt M16=== |
||
| − | :''Main section: [[ |
+ | :''Main section: [[Rifles on 24#Colt M16|Colt M16]]'' |
{| class="fancy left top" style="font-size:84%;float:left;" |
{| class="fancy left top" style="font-size:84%;float:left;" |
||
|- |
|- |
||
| Line 378: | Line 377: | ||
| [[File:M16A1_1x11.jpg|100px]] |
| [[File:M16A1_1x11.jpg|100px]] |
||
| {{ep|1x09s}}<br>{{ep|1x11s}}<br>{{ep|1x12s}} |
| {{ep|1x09s}}<br>{{ep|1x11s}}<br>{{ep|1x12s}} |
||
| − | | [[ |
+ | | [[Gaines' thug]] carried an M16 when patrolling near to Kim and Teri's "guest house". He also held it while [[Andre Drazen]] entered the compound. |
| + | |} |
||
| + | {{-}} |
||
| + | ===Colt M4A1=== |
||
| + | :''Main section: [[Rifles on 24#Colt M4A1|Colt M4A1]]'' |
||
| + | {| class="fancy left top" style="font-size:84%;float:left;" |
||
| + | |- |
||
| + | ! style="width:75px;" | Image !! style="width:100px;" | Episode(s) !! Description |
||
| + | |- |
||
| + | | [[File:Dunlop hitman -3.jpg|100px]] |
||
| + | | {{ep|1x02s}} |
||
| + | | The sniper that killed [[Richard Walsh]] fired a Colt M4A1 fitted with a PVS-14 Night Vision Optic. |
||
|} |
|} |
||
{{-}} |
{{-}} |
||
| − | |||
===Colt XM177=== |
===Colt XM177=== |
||
| − | :''Main section: [[ |
+ | :''Main section: [[Rifles on 24#Colt XM177|Colt XM177]]'' |
{| class="fancy left top" style="font-size:84%;float:left;" |
{| class="fancy left top" style="font-size:84%;float:left;" |
||
|- |
|- |
||
| Line 393: | Line 402: | ||
|} |
|} |
||
{{-}} |
{{-}} |
||
| − | |||
===Norinco NDM-86=== |
===Norinco NDM-86=== |
||
| − | :''Main section: [[ |
+ | :''Main section: [[Rifles on 24#Norinco NDM-86|Norinco NDM-86]]'' |
{| class="fancy left top" style="font-size:84%;float:left;" |
{| class="fancy left top" style="font-size:84%;float:left;" |
||
|- |
|- |
||
| Line 405: | Line 413: | ||
|} |
|} |
||
{{-}} |
{{-}} |
||
| − | |||
===Remington 700=== |
===Remington 700=== |
||
| − | :''Main section: [[ |
+ | :''Main section: [[Rifles on 24#Remington 700|Remington 700]]'' |
{| class="fancy left top" style="font-size:84%;float:left;" |
{| class="fancy left top" style="font-size:84%;float:left;" |
||
|- |
|- |
||
| Line 414: | Line 421: | ||
| [[File:R700_1x03.jpg|100px]] |
| [[File:R700_1x03.jpg|100px]] |
||
| {{ep|1x02s}}<br>{{ep|1x03s}} |
| {{ep|1x02s}}<br>{{ep|1x03s}} |
||
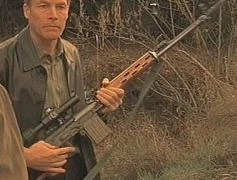
| − | | [[Jonathan Matijevich]] |
+ | | [[Jonathan Matijevich]] took target practice with a Remington 700PSS mounted on an AICS bipod, shooting an egg on a fence several yards distant. He later used the rifle to assassinate [[Bridgit]] after she led [[Ira Gaines]] to where she had buried [[Martin Belkin]]'s ID. |
|} |
|} |
||
{{-}} |
{{-}} |
||
==Shotguns== |
==Shotguns== |
||
| − | ===Mossberg |
+ | ===Mossberg 500=== |
| − | :''Main section: [[ |
+ | :''Main section: [[Shotguns on 24#Mossberg 500|Mossberg 500]]'' |
| − | {| class="fancy left top" style="font-size:84%;float:left;" |
||
| − | |- |
||
| − | ! style="width:75px;" | Image !! style="width:100px;" | Episode(s) !! Description |
||
| − | |- |
||
| − | | [[File:M590_1x19.jpg|100px]] |
||
| − | | {{ep|1x19s}} |
||
| − | | To rip off the ecstasy dealers, [[Frank Allard]] called his "friends," who brought him a Mossberg 590 Compact Cruiser with a pistol grip. Allard used the shotgun to disarm [[Krugman]] and his partner, and smashed Krugman in the face, breaking his nose. After SWAT teams entered the house, Krugman took the gun from Frank and used it to control the situation. |
||
| − | |} |
||
| − | {{-}} |
||
| − | |||
| − | ===Remington 870=== |
||
| − | :''Main section: [[Weapons on 24#Remington 870|Remington 870]]'' |
||
{| class="fancy left top" style="font-size:84%;float:left;" |
{| class="fancy left top" style="font-size:84%;float:left;" |
||
|- |
|- |
||
| Line 439: | Line 434: | ||
| [[File:1x04 remington 870.jpg|100px]] |
| [[File:1x04 remington 870.jpg|100px]] |
||
| {{ep|1x04s}}<br>{{ep|1x05s}} |
| {{ep|1x04s}}<br>{{ep|1x05s}} |
||
| − | | [[Jessie Hampton]] had a |
+ | | [[Jessie Hampton]] had a Mossberg 500 shotgun in her patrol car. Another was seen in the car taking Penticoff to the station, which was possibly the same car. |
|- class="odd" |
|- class="odd" |
||
| [[File:1x06 Remington.jpg|100px]] |
| [[File:1x06 Remington.jpg|100px]] |
||
| {{ep|1x06s}}<br>{{ep|1x07s}} |
| {{ep|1x06s}}<br>{{ep|1x07s}} |
||
| − | | A guard at the [[Gaines compound]] carried a |
+ | | A guard at the [[Gaines compound]] carried a Mossberg while patrolling the perimeter. He was still carrying it when he almost discovered [[Kim Bauer]] and [[Rick Allen]] escaping through the fence. |
|- |
|- |
||
| [[File:Big bandana man ep6.jpg|100px]] |
| [[File:Big bandana man ep6.jpg|100px]] |
||
| {{ep|1x06s}} |
| {{ep|1x06s}} |
||
| − | | Another guard at the compound carried a |
+ | | Another guard at the compound carried a Mossberg shotgun. |
|- class="odd" |
|- class="odd" |
||
| [[File:1x10 remington.jpg|100px]] |
| [[File:1x10 remington.jpg|100px]] |
||
| {{ep|1x10s}} |
| {{ep|1x10s}} |
||
| − | | The police car that pulled Jack over to the side of the road had a |
+ | | The police car that pulled Jack over to the side of the road had a Mossberg 500 in the front. |
|- |
|- |
||
| [[File:1x14 remington.jpg|100px]] |
| [[File:1x14 remington.jpg|100px]] |
||
| {{ep|1x14s}} |
| {{ep|1x14s}} |
||
| − | | One of the survivors of the compound carried a |
+ | | One of the survivors of the compound carried a Mossberg shotgun until he was blown up by [[Alexis Drazen]]. |
| + | |} |
||
| + | {{-}} |
||
| + | ===Mossberg 590=== |
||
| + | :''Main section: [[Shotguns on 24#Mossberg 590|Mossberg 590]]'' |
||
| + | {| class="fancy left top" style="font-size:84%;float:left;" |
||
| + | |- |
||
| + | ! style="width:75px;" | Image !! style="width:100px;" | Episode(s) !! Description |
||
| + | |- |
||
| + | | [[File:M590_1x19.jpg|100px]] |
||
| + | | {{ep|1x19s}} |
||
| + | | To rip off the ecstasy dealers, [[Frank Allard]] called his "friends," who brought him a Mossberg 590 Compact Cruiser with a pistol grip. Allard used the shotgun to disarm [[Sam Krugman]] and his partner, and smashed Krugman in the face, breaking his nose. After SWAT teams entered the house, Krugman took the gun from Frank and used it to control the situation. |
||
|} |
|} |
||
{{-}} |
{{-}} |
||
==Submachine guns== |
==Submachine guns== |
||
| − | ===Cobray M |
+ | ===Cobray M-11=== |
| − | :''Main section: [[ |
+ | :''Main section: [[Submachine guns on 24#Cobray M-11|Cobray M-11]]'' |
{| class="fancy left top" style="font-size:84%;float:left;" |
{| class="fancy left top" style="font-size:84%;float:left;" |
||
|- |
|- |
||
| Line 468: | Line 474: | ||
| [[File:1x12 Cobray 2.jpg|100px]] |
| [[File:1x12 Cobray 2.jpg|100px]] |
||
| {{ep|1x12s}}<br>{{ep|1x13s}} |
| {{ep|1x12s}}<br>{{ep|1x13s}} |
||
| − | | [[Kevin Carroll]] used a Cobray M |
+ | | [[Kevin Carroll]] used a Cobray M-11 when chasing the Bauer out of the compound. He kept it until he heard the CTU helicopter approaching, and fled the scene. |
|- class="odd" |
|- class="odd" |
||
| [[File:1x12 Cobray.jpg|100px]] |
| [[File:1x12 Cobray.jpg|100px]] |
||
| {{ep|1x12s}} |
| {{ep|1x12s}} |
||
| − | | One of the men blown up by the van was carrying a Cobray M |
+ | | One of the men blown up by the van was carrying a Cobray M-11. |
|} |
|} |
||
{{-}} |
{{-}} |
||
| − | |||
=== Heckler & Koch MP5 === |
=== Heckler & Koch MP5 === |
||
| − | :''Main section: [[ |
+ | :''Main section: [[Submachine guns on 24#Heckler & Koch MP5|Heckler & Koch MP5]]'' |
{| class="fancy left top" style="font-size:84%;float:left;" |
{| class="fancy left top" style="font-size:84%;float:left;" |
||
|- |
|- |
||
| Line 484: | Line 489: | ||
| [[File:1x06 MP5.jpg|100px]] |
| [[File:1x06 MP5.jpg|100px]] |
||
| {{ep|1x06s}}<br>{{ep|1x12s}}<br>{{ep|1x13s}} |
| {{ep|1x06s}}<br>{{ep|1x12s}}<br>{{ep|1x13s}} |
||
| − | | [[ |
+ | | [[Gaines' thug]] carried an MP5 when taking [[Kim Bauer]] to see [[Ira Gaines]]. He later had it when guarding the front gate, and then arrived at the burnt-out van with it. |
|- class="odd" |
|- class="odd" |
||
| [[File:1x07 MP5.jpg|100px]] |
| [[File:1x07 MP5.jpg|100px]] |
||
| Line 519: | Line 524: | ||
|} |
|} |
||
{{-}} |
{{-}} |
||
| − | |||
===IMI Uzi=== |
===IMI Uzi=== |
||
| − | :''Main section: [[ |
+ | :''Main section: [[Submachine guns on 24#IMI Uzi|IMI Uzi]]'' |
{| class="fancy left top" style="font-size:84%;float:left;" |
{| class="fancy left top" style="font-size:84%;float:left;" |
||
|- |
|- |
||
| Line 559: | Line 563: | ||
|} |
|} |
||
{{-}} |
{{-}} |
||
| − | |||
===Škorpion vz. 61=== |
===Škorpion vz. 61=== |
||
| − | :''Main section: [[ |
+ | :''Main section: [[Submachine guns on 24#Škorpion vz. 61|Škorpion vz. 61]]'' |
{| class="fancy left top" style="font-size:84%;float:left;" |
{| class="fancy left top" style="font-size:84%;float:left;" |
||
|- |
|- |
||
| Line 575: | Line 578: | ||
|} |
|} |
||
{{-}} |
{{-}} |
||
| − | |||
===Steyr SPP=== |
===Steyr SPP=== |
||
| − | :''Main section: [[ |
+ | :''Main section: [[Submachine guns on 24#Steyr SPP|Steyr SPP]]'' |
{| class="fancy left top" style="font-size:84%;float:left;" |
{| class="fancy left top" style="font-size:84%;float:left;" |
||
|- |
|- |
||
| Line 584: | Line 586: | ||
| [[File:1x19 Steyr SPP.jpg|100px]] |
| [[File:1x19 Steyr SPP.jpg|100px]] |
||
| {{ep|1x19s}} |
| {{ep|1x19s}} |
||
| − | | |
+ | | At [[1804 Glade]], the accomplice of [[Frank Allard]] and [[Craig (Day 1)|Craig]] (played by [[Henry M. Kingi, Jr.]]) armed himself a Steyr SPP before the drug deal. During the deal he held the female [[Krugman's_partner|undercover cop]] at gunpoint with the weapon, however after the DEA burst in it changed to a [[#Glock 17|Glock 17]]. |
|} |
|} |
||
{{-}} |
{{-}} |
||
| + | ==Other guns== |
||
| − | =Explosives= |
||
| + | ===Advanced Taser M26=== |
||
| − | =Knives= |
||
| + | :''Main section: [[Miscellaneous weapons on 24#Advanced Taser M26|Advanced Taser M26]]'' |
||
| + | {| class="fancy left top" style="font-size:84%;float:left;" |
||
| + | |- |
||
| + | ! style="width:75px;" | Image !! style="width:100px;" | Episode(s) !! Description |
||
| + | |- |
||
| + | | [[File:1x20 Taser.jpg|100px]] |
||
| + | | {{ep|1x20s}} |
||
| + | | When [[Jack Bauer]] was investigating [[21911 Kipling Avenue]], a guard hit him with an M26 Advanced Taser, rendering him unconscious. |
||
| + | |} |
||
| + | {{-}} |
||
| + | ===Heckler & Koch P2A1=== |
||
| + | :''Main section: [[Miscellaneous weapons on 24#Heckler & Koch P2A1|Heckler & Koch P2A1]]'' |
||
| + | {| class="fancy left top" style="font-size:84%;float:left;" |
||
| + | |- |
||
| + | ! style="width:75px;" | Image !! style="width:100px;" | Episode(s) !! Description |
||
| + | |- |
||
| + | | [[File:1x16 P2A1.jpg|100px]] |
||
| + | | {{ep|1x16s}} |
||
| + | | When invading the [[23033 Pine Canyon]] safe house, [[Jovan Myovic]] killed [[Jeff Breeher]] with a bolt loaded into a Heckler & Koch P2A1 flare gun. |
||
| + | |} |
||
| + | {{-}} |
||
| + | ===Palmer Cap-Chur Short Range Projector=== |
||
| + | :''Main section: [[Miscellaneous weapons on 24#Palmer Cap-Chur Short Range Projector|Palmer Cap-Chur Short Range Projector]]'' |
||
| + | {| class="fancy left top" style="font-size:84%;float:left;" |
||
| + | |- |
||
| + | ! style="width:75px;" | Image !! style="width:100px;" | Episode(s) !! Description |
||
| + | |- |
||
| + | | [[File:1x01 dartgun.jpg|100px]] |
||
| + | | {{ep|1x01s}} |
||
| + | | When [[George Mason]] refused to give up the name of the source of the [[David Palmer]] assassination intel, [[Jack Bauer]] went out of his office and downstairs to a cupboard. He got a Palmer Cap-Chur tranquilizer pistol and concealed it in a binder, before going back to his office and shooting Mason in the leg. |
||
| + | |} |
||
| + | {{-}} |
||
| + | ===Stun gun=== |
||
| + | :''Main section: [[Miscellaneous weapons on 24#Stun gun|Stun gun]]'' |
||
| + | {| class="fancy left top" style="font-size:84%;float:left;" |
||
| + | |- |
||
| + | ! style="width:75px;" | Image !! style="width:100px;" | Episode(s) !! Description |
||
| + | |- |
||
| + | | [[File:1x24 stun gun.jpg|100px]] |
||
| + | | {{ep|1x24s}} |
||
| + | | [[Nina Myers]] used a stun gun during her murder of [[Jamey Farrell]]. |
||
| + | |} |
||
| + | {{-}} |
||
| + | |||
| + | ==Knives== |
||
| + | ===Benchmade 259s=== |
||
| + | :''Main section: [[Knives on 24#Benchmade 259s|Benchmade 259s]]'' |
||
| + | {| class="fancy left top" style="font-size:84%;float:left;" |
||
| + | |- |
||
| + | ! style="width:75px;" | Image !! style="width:100px;" | Episode(s) !! Description |
||
| + | |- |
||
| + | | [[File:1x03 balisong.jpg|100px]] |
||
| + | | {{ep|1x03s}} |
||
| + | | [[Larry Rogow]] had a Benchmade 259s balisong knife in his living quarters, and picked it up to threaten [[Kim Bauer]] and [[Janet York]] as he told them to leave. |
||
| + | |} |
||
| + | {{-}} |
||
| + | ===Benchmade 2550 Mini-reflex=== |
||
| + | :''Main section: [[Knives on 24#Benchmade 2550 Mini-reflex|Benchmade 2550 Mini-reflex]]'' |
||
| + | {| class="fancy left top" style="font-size:84%;float:left;" |
||
| + | |- |
||
| + | ! style="width:75px;" | Image !! style="width:100px;" | Episode(s) !! Description |
||
| + | |- |
||
| + | | [[File:1x02 TAC folder.jpg|100px]] |
||
| + | | {{ep|1x02s}}<br>{{ep|1x10s}}<br>{{ep|1x11s}}<br>{{ep|1x12s}} |
||
| + | | [[Jack Bauer]] carried this TAC folder during the first half of day one. He had it at [[2350 Dunlop Plaza]] to cut off an assassin's thumb, and later used it at a car park to break into a car. He then used it when tying up [[Kevin Carroll]] at the [[Nordhoff garage]], and later when untying him at the [[Gaines compound]]. |
||
| + | |} |
||
| + | {{-}} |
||
| + | ===Microtech HALO=== |
||
| + | :''Main section: [[Knives on 24#Microtech HALO|Microtech HALO]]'' |
||
| + | {| class="fancy left top" style="font-size:84%;float:left;" |
||
| + | |- |
||
| + | ! style="width:75px;" | Image !! style="width:100px;" | Episode(s) !! Description |
||
| + | |- |
||
| + | | [[File:1x11 HALO.jpg|100px]] |
||
| + | | {{ep|1x11s}}<br>{{ep|1x12s}}<br>{{ep|1x24s}} |
||
| + | | [[Ted Cofell]] had a Microtech HALO knife concealed in the armrest of his limousine. After being captured by [[Jack Bauer]], he drew the knife and attacked Jack with it. Jack disarmed killed him, taking the knife for himself. Later, he used it to sever the fuel line on a van when escaping the [[Gaines compound]], allowing him to shoot and detonate the van. He kept the knife throughout the day and used it to cut [[Teri Bauer|his wife]] out of her bindings once he found her dead. |
||
| + | |} |
||
| + | {{-}} |
||
| + | ===Milano Stiletto=== |
||
| + | :''Main section: [[Knives on 24#Milano Stiletto|Milano Stiletto]]'' |
||
| + | {| class="fancy left top" style="font-size:84%;float:left;" |
||
| + | |- |
||
| + | ! style="width:75px;" | Image !! style="width:100px;" | Episode(s) !! Description |
||
| + | |- |
||
| + | | [[File:1x11 switchblade.jpg|100px]] |
||
| + | | {{ep|1x11s}}<br>{{ep|1x12s}} |
||
| + | | [[Eli Stram]] carried a Milano Stiletto switchblade, drawing it after being disarmed by [[Teri Bauer|Teri]] and [[Kim Bauer]]. He was shot before using it, and Kim took it as a defensive weapon. She drew the blade when she heard [[Jack Bauer|her father]] approaching their building, but Jack left the blade with Eli's corpse when the family escaped. |
||
| + | |} |
||
| + | {{-}} |
||
| + | |||
| + | ==Explosives== |
||
| + | ===Bomb=== |
||
| + | :''Main section: [[Explosives on 24#Bomb|Bomb]]'' |
||
| + | {| class="fancy left top" style="font-size:84%;float:left;" |
||
| + | |- |
||
| + | ! style="width:75px;" | Image !! style="width:100px;" | Episode(s) !! Description |
||
| + | |- |
||
| + | | [[File:1x01 pipe bomb.jpg|100px]] |
||
| + | | {{ep|1x01s}} |
||
| + | | [[Mandy]] extracted an explosive device from a fire extinguisher aboard [[Flight 221]], before sticking it on a bin and blowing the plane up. It looked like several pipe bombs hooked up to a timer display. |
||
| + | |} |
||
| + | {{-}} |
||
| + | ===C-4 explosive=== |
||
| + | :''Main section: [[Explosives on 24#C-4 explosive|C-4 explosive]]'' |
||
| + | {| class="fancy left top" style="font-size:84%;float:left;" |
||
| + | |- |
||
| + | ! style="width:75px;" | Image !! style="width:100px;" | Episode(s) !! Description |
||
| + | |- |
||
| + | | [[File:1x21 C4.jpg|100px]] |
||
| + | | {{ep|1x20s}}<br>{{ep|1x21s}} |
||
| + | | [[Harris (Day 1)|Harris's]] men loaded C-4 explosive into their bags while staking out [[21911 Kipling Avenue]]. Later, they used it to collapse a corridor inside the facility, before leaving it to booby trap their escape to stop [[Drake (Day 1)|Drake]] and his team following them. |
||
| + | |} |
||
| + | {{-}} |
||
| + | ===Primer cord=== |
||
| + | :''Main section: [[Explosives on 24#Primer cord|Primer cord]]'' |
||
| + | {| class="fancy left top" style="font-size:84%;float:left;" |
||
| + | |- |
||
| + | ! style="width:75px;" | Image !! style="width:100px;" | Episode(s) !! Description |
||
| + | |- |
||
| + | | [[File:1x01 primacord.jpg|100px]] |
||
| + | | {{ep|1x01s}} |
||
| + | | [[Mandy]] used a length of primer cord to wrap around the door of [[Flight 221]], before using a silver detonator to blow the door away. She then parachuted out of the plane to safety. |
||
| + | |} |
||
| + | {{-}} |
||
| + | |||
| + | == External links == |
||
| + | |||
| + | * [http://www.imfdb.org/wiki/24_-_Season_1 24 Season 1] on the [http://www.imfdb.org/ Internet Movie Firearms Database] |
||
[[Category:Lists]] |
[[Category:Lists]] |
||
| + | [[Category:Weapons on 24| 1]] |
||
| + | [[Category:Day 1]] |
||
Latest revision as of 07:14, 25 April 2019


| Weapons |
|---|
| Handguns · Rifles · Shotguns · Submachine guns · Knives · Explosives · Misc |
| Weapons used by Jack Bauer |
| By season |
| 1 · 2 · 3 · 4 · 5 · 6 · R · 7 · 8 · 9 · 10 |
This article lists weapons seen in Season 1 of 24.
Handguns[]
Beretta 92[]
- Main section: Beretta 92
| Image | Episode(s) | Description |
|---|---|---|
| "1:00am-2:00am" | Richard Walsh used a silenced Beretta 92FS during the escape from 2350 Dunlop Plaza. | |

|
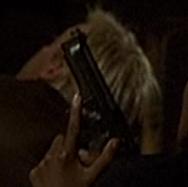
"1:00am-2:00am" | Gaines' henchman pointed a Beretta at Bridgit's head when she refused to give him the keycard. |

|
"2:00am-3:00am" | A Beretta was seen on the bed at Gaines' safe house, among Jonathan's equipment. |
|
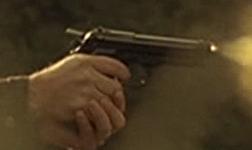
"3:00am-4:00am" | Jessie Hampton carried a Beretta when pursuing Penticoff at 18166 San Fernando Road, before Penticoff held her hostage. |
|
"3:00am-4:00am" "4:00am-5:00am" |
The other officers of the Van Nuys Precinct also carried Berettas as their sidearm, including Douglas Newman, Kiley, and Phillips. |
|
"4:00am-5:00am" "6:00am-7:00am" "11:00am-12:00pm" "12:00pm-1:00pm" |
Ira Gaines carried a Beretta as his weapon during the day. When Kim Bauer tried to get the attention of a truck driver, he pointed it at her telling her to stop. He then used the gun to kill Dan Mounts. Later, when threatening Jack Bauer into co-operation, he fired a shot from the gun into his microphone. He later used the gun when raiding the "guest house" of his compound, before swapping it in favor of Neil Nagi's Norinco rifle. He drew it again after Jack shot his hand, and kept it with him until his death. |

|
"7:00am-8:00am" "8:00am-9:00am" "11:00am-12:00pm" "12:00pm-1:00pm" |
Neil Nagi used a Beretta 92FS as his sidearm, nearly executing Teri and Kim Bauer after Jack interrupts the assassination attempt against David Palmer. He kept it in the back of his trousers during the following episode, before using it to raid the "guest house" with Gaines. He then used it to shoot at the van, and later, used when hunting the Bauer women before being shot. |
|
"7:00am-8:00am" "8:00am-9:00am" "10:00am-11:00am" "11:00am-12:00pm" "12:00pm-1:00pm" |
Eli Stram used a similar Beretta 92FS during the near-execution of the Bauer women. When he returned to execute them again in "10:00am-11:00am," Teri managed to steal the gun from him and shot him twice in the chest. During the escape, Jack took the Beretta from her and briefly used it while shooting at the mercenaries from behind the van, before giving it back to Teri and telling her to flee with Kim. Teri used it for the remainder of the escape, nearly having to shoot Neil when he discovered their hiding place. |

|
"8:00am-9:00am" | Mitchell and the other Secret Service agents at the Santa Clarita Power Plant drew Berettas when Jack Bauer escaped. However they did not fire them in order to avoid an explosion. |
|
"9:00am-10:00am" | The police officers that were searching for Jack Bauer all carried Berettas. |

|
"6:00pm-7:00pm" | Newman and his Superior Alarm colleague both carried Berettas when responding to the alarm call at the Bauer house. |
|
"6:00pm-7:00pm" | A masked SWAT team member used a Beretta to shoot and kill an accomplice of Frank Allard and Craig. |

|
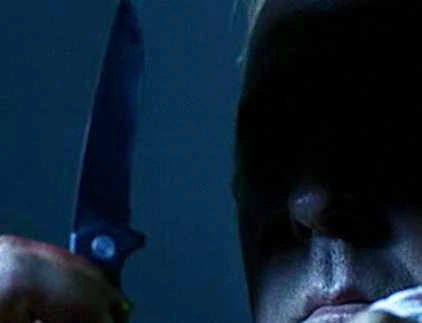
"9:00pm-10:00pm" "10:00pm-11:00pm" |
When Jack Bauer took Mila Luminović hostage at knife point, Boris pulled out a Beretta. He lowered it after Jack ordered them to. He later carried it after Kim Bauer escaped from captivity at Dock 11A. |

|
"10:00pm-11:00pm" | After the bombing at the Palmer campaign hotel, a Secret Service agent pulled a Beretta pistol. |
Glock 17[]
- Main section: Glock 17
| Image | Episode(s) | Description |
|---|---|---|
|
"2:00am-3:00am" | A Glock 17 was seen on the bed at Gaines' safe house, among Jonathan's equipment. |

|
"3:00am-4:00am" | Greg Penticoff shot at Jack Bauer and Jessie Hampton with a Glock 17 at 18166 San Fernando Road, and used it to take Hampton hostage. |
|
"7:00am-8:00am" "8:00am-9:00am" "10:00am-11:00am" "11:00am-12:00pm" "12:00pm-1:00pm" |
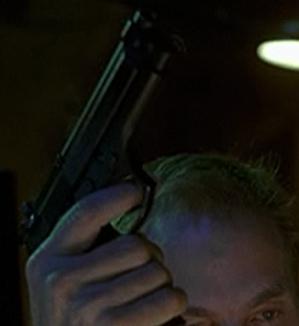
Secret Service agent Alan Hayes carried a Glock 17, which Jack Bauer made a grab for to get David Palmer out of the Santa Clarita Power Plant. Later, as Jack was being transferred to FBI custody, he took the gun and used it to carjack and hold hostage Lauren Proctor. He tucked it into his trousers when interrogating Ted Cofell. The handgun reappeared during the Bauers' escape from Gaines' base, where Jack fired both the Glock and Eli Stram's Beretta 92FS in addition to the P229. He kept hold of the gun, using it to shoot at Neil Nagi, but dropped it when it ran out of ammo. |

|
"10:00am-11:00am" | Kevin Carroll used a Glock 17 to shoot at Jack Bauer in the limousine. He lost it when Jack drove erratically, throwing him around in the back seat. |

|
"3:00pm-4:00pm" | Ted Paulson used a Glock 17 to search the CTU safehouse for intruders. |
|
"6:00pm-7:00pm" | Frank Allard used a Glock to threaten Kim Bauer when he found out his brother was dead. |

|
"6:00pm-7:00pm" | An accomplice of Frank Allard and Craig (Day 1) used a Glock to shoot at the SWAT team that invaded 1804 Glade. |

|
"6:00pm-7:00pm" | The DEA agents that entered 1804 Glade carried Glock 17 pistols. |
|
"7:00pm-8:00pm" "8:00pm-9:00pm" |
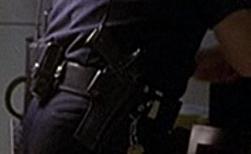
All the police officers at the station Kim was brought to carried Glocks as their side arms. |

|
"9:00pm-10:00pm" | When Jack Bauer held Mila Luminović hostage at knife point, Marko and another man drew Glock pistols and aimed them towards Jack. They lowered them on Jack's order. |

|
"11:00pm-12:00am" | When Nina Myers was planning her extraction from CTU Los Angeles, she pulled out a silenced Glock and killed a CTU worker. She later used the gun to threaten and kill Teri Bauer, kill two CTU security guards, and shoot at Jack Bauer in the parking lot. She lost the gun when apprehended by Jack. |
Glock 19[]
- Main section: Glock 19
| Image | Episode(s) | Description |
|---|---|---|

|
"1:00pm-2:00pm" | Alexis Drazen used a Glock 19 to execute Kevin Carroll after wiping out the rest of his team. |
Heckler & Koch USP[]
- Main section: Heckler & Koch USP
| Image | Episode(s) | Description |
|---|---|---|

|
"1:00am-2:00am" | The two hitmen at 2350 Dunlop Plaza were armed with silenced USPs. |
|
"1:00pm-2:00pm" "3:00pm-4:00pm" "5:00pm-6:00pm" "6:00pm-7:00pm" |
Jovan Myovic wielded a suppressed USP Tactical during the raid on the Bauers' safehouse with Mishko Suba, using it to shoot and fatally wound Ted Paulson. Later, he used it to attack Teri Bauer at her home, killing Williams and Chris and wounding Phil Parslow before Tony Almeida shot him. |

|
"8:00pm-9:00pm" | The men that kidnapped Kim Bauer carried silenced USPs. |

|
"11:00pm-12:00am" | Jack Bauer used a pair of USPs during the shootout against the Drazens at the Port of Los Angeles, using them to kill Marko and Andre Drazen along with reportedly four others. After Victor Drazen surrendered himself, Jack killed him, firing the remaining bullets in one of the USPs until his magazine was empty. |
Jericho 941[]
- Main section: Jericho 941
| Image | Episode(s) | Description |
|---|---|---|
|
"7:00am-8:00am" "8:00am-9:00am" |
Tony Almeida used a Jericho 941 to apprehend Jamey in CTU's restroom and get her out before Ira Gaines noticed on the surveillance camera. |
Magnum Research Lone Eagle[]
- Main section: Magnum Research Lone Eagle
| Image | Episode(s) | Description |
|---|---|---|

|
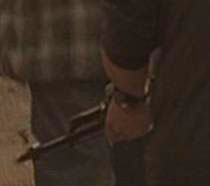
"7:00am-8:00am" | Ira Gaines ordered Jack Bauer to smuggle a Magnum Research Lone Eagle, chambered in an unknown rifle caliber, into the breakfast at the Santa Clarita Power Plant, concealed in a briefcase underneath a laptop. He assembled the single-shot pistol for Jonathan Matijevich, ensuring that his fingerprints would be found on the weapon and incriminate him for the assassination of David Palmer. |
SIG Sauer P226[]
- Main section: SIG Sauer P226
| Image | Episode(s) | Description |
|---|---|---|
|
"1:00pm-2:00pm" | When Kevin Carroll reached the extraction point after escaping the Gaines compound, he saw Andre Drazen watching him from the bluff. He drew his SIG P226, but was knocked down by the shack exploding, allowing Drazen to approach and kick the SIG out of reach. |

|
"6:00pm-7:00pm" | Chris carried a SIG Sauer pistol for protecting Teri Bauer, but she panicked at the sight of the gun and asked him to wait outside. Later, he tried to draw the gun when he saw Jovan Myovic but Myovic was too quick and killed him. |

|
"7:00pm-8:00pm" "8:00pm-9:00pm" |
Andre Drazen had a SIG Sauer P226 during the raid on the Saugus detention center, and shot and killed Mark DeSalvo with the gun. |
SIG Sauer P228[]
- Main section: SIG Sauer P228
| Image | Episode(s) | Description |
|---|---|---|
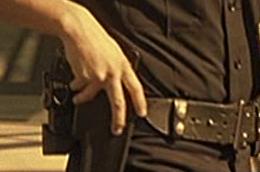
|
"1:00am-2:00am" "6:00am-7:00am" "7:00am-8:00am" "8:00am-9:00am" |
Beginning in "1:00am-2:00am" and for most of the season, Jack Bauer uses a two-tone nickel-plated P228 as his sidearm of choice, both with and without a suppressor. Notable appearances include:
He lost the gun to Frank Simes when he was arrested by Secret Service. |

|
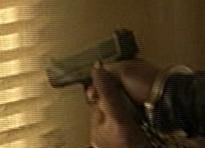
"9:00am-10:00am" "10:00am-11:00am" "12:00pm-1:00pm" |
After escaping from Secret Service custody, Nina Myers sent Jack a car with a "care package" containing another SIG Sauer P228. Jack loaded the gun with 9mm ammunition before setting off, and then later used the gun to kidnap and threaten Ted Cofell. He then used it after rescuing his family, to kill Neil Nagi and Ira Gaines, before surrendering it to Bundy and his team. |

|
"7:00pm-8:00pm" "8:00pm-9:00pm" "9:00pm-10:00pm" "10:00pm-11:00pm" "11:00pm-12:00am" |
Jack took another SIG Sauer P228 when investigating 21911 Kipling Avenue, which was taken by Mark DeSalvo. DeSalvo gave the gun back to Jack, who used it when transporting Victor Drazen out of the facility. He then used it to hold Drazen hostage, but Victor appropriated it for himself. Drazen used the gun to kill Mila and Nikola Luminović at their restaurant ("9:00pm-10:00pm"), and during the final shootout with Jack at the Port of Los Angeles. ("11:00pm-12:00am") |
SIG Sauer P229[]
- Main section: SIG Sauer P229
| Image | Episode(s) | Description |
|---|---|---|
|
"1:00am-2:00am" "3:00am-4:00am" "4:00am-5:00am" |
In a possible continuity error, the P228 Jack uses during the early part of the season occasionally changes to a P229. Notable appearances include:
|
|
"11:00am-12:00pm" | Throughout episode 12, Jack's pistol is a P229, despite him carrying a P228 in the preceding and following episode. He used it to force Kevin Carroll to drive him inside Gaines' base, and also used it with a silencer to locate and rescue Teri and Kim. |
Smith & Wesson 5904[]
- Main section: Smith & Wesson 5904
| Image | Episode(s) | Description |
|---|---|---|

|
"2:00am-3:00am" | A Smith & Wesson 5904 was seen on the bed at Gaines' safe house, among Jonathan's equipment. |

|
"3:00am-4:00am" "10:00am-11:00am" "11:00am-12:00pm" |
Dan Mounts carried a Smith & Wesson 5904 in his van, which he stuck out of the window in order to shoot Janet York. After Dan was killed, Rick Allen gave the gun to Teri Bauer, who tried to use it to shoot Eli Stram. However the gun jammed, and Eli disarmed her. Later Jack Bauer took the gun's magazine, leaving it empty on the table by Eli's body. |
Smith & Wesson 5906[]
- Main section: Smith & Wesson 5906
| Image | Episode(s) | Description |
|---|---|---|

|
"4:00am-5:00am" "9:00pm-10:00pm" "11:00pm-12:00am" |
George Mason's sidearm was a Smith & Wesson 5906, first seen when he arrived to arrest Jack Bauer and Greg Penticoff in "4:00am-5:00am." Mason also pulled the gun to briefly stop Serge from leaving with Alexis Drazen in "9:00pm-10:00pm." |

|
"2:00pm-3:00pm" | Robert Ellis carried a S&W 5906, taking it out when he became suspicious of a man in his bar. |

|
"6:00pm-7:00pm" "7:00pm-8:00pm" "8:00pm-9:00pm" |
Sam Krugman pulled out a S&W 5906 during the sting operation drug deal with Frank Allard, but quickly put it down when he realized he was outnumbered. He later carried it in his shoulder holster when interrogating Kim Bauer, and when transferring her to a police car. When the car was hit, he tried to draw the weapon but was shot. |
Smith & Wesson SW99[]
- Main section: Smith & Wesson SW99
| Image | Episode(s) | Description |
|---|---|---|
|
"9:00pm-10:00pm" "10:00pm-11:00pm" "11:00pm-12:00am" |
Andre Drazen used a Smith & Wesson SW99 at Dock 11A, when trying to stop Kim Bauer from escaping. He later used the gun during the final shootout with Jack. |
Taurus PT92[]
- Main section: Taurus PT92
| Image | Episode(s) | Description |
|---|---|---|

|
"3:00pm-4:00pm" | Mishko Suba used a stainless steel Taurus PT92 when invading the safe house at 23033 Pine Canyon. |
|
"6:00pm-7:00pm" "7:00pm-8:00pm" |
Tony Almeida used a stainless steel Taurus PT92 when rescuing Teri Bauer from Jovan Myovic at the Bauer house. |
Walther PP[]
- Main section: Walther PP
| Image | Episode(s) | Description |
|---|---|---|
|
"6:00pm-7:00pm" | The undercover cop with Krugman pulled out a Walther PPK during the drug deal, however she too dropped the gun after facing superior firepower. |
Rifles[]
AK variant[]
- Main section: AK variant
| Image | Episode(s) | Description |
|---|---|---|
|
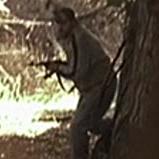
"10:00am-11:00am" | A guard at the gate of the Gaines compound carried an AK while Andre Drazen was driven in. |
|
"10:00am-11:00am" "12:00pm-1:00pm" |
One of the compound guards traded his M16 for an AKM when guarding the gate as Andre Drazen arrived. He later carried it when investigating the burnt-out van after Jack Bauer escaped. |

|
"10:00am-11:00am" "11:00am-12:00pm" |
Another compound guard carried a Norinco Type 56 version of the AK-47, again at the gate as Drazen arrived. Later he carried it while loading up the boxes into the vans outside Gaines' building. |
|
"11:00am-12:00pm" | Another guard at the Gaines compound carried an AK while patrolling past the "guest house". He was seen by Teri Bauer. |

|
"11:00am-12:00pm" | A guard at the gate of the Gaines compound carried an AK, seen as Jack Bauer approached the gate with Kevin Carroll. He later used the gun to fire on Jack as he escaped in a red van. |

|
"11:00am-12:00pm" | The tip of an AKM was seen in one of the red vans, as Gaines' men loaded the gear into them. |
|
"12:00pm-1:00pm" | Pollock carried an AK. |
| "7:00pm-8:00pm" "8:00pm-9:00pm" |
All but one of Harris's mercenaries carried AKs as they staked out 21911 Kipling Avenue. They also used them when raiding the facility and taking Jack Bauer hostage. |
Colt AR-15[]
- Main section: Colt AR-15
| Image | Episode(s) | Description |
|---|---|---|
|
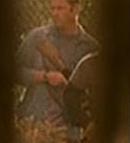
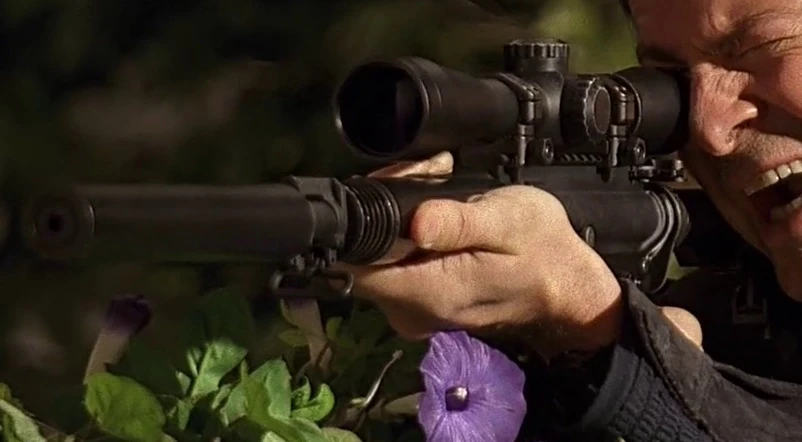
"5:00pm-6:00pm" | Teddy Hanlin used a suppressed 5.56mm Colt AR-15 rifle to provide backup for Jack Bauer - and later used it to shoot and kill Alan Morgan. It was a custom design with a free float tube handguard and suppressor attached. |
Colt M16[]
- Main section: Colt M16
| Image | Episode(s) | Description |
|---|---|---|
|
"5:00am-6:00am" "6:00am-7:00am" "8:00am-9:00am" |
A guard at the Gaines compound carried an M16 when patrolling the perimeter fence, and also standing guard as Teri Bauer was taken to see Gaines. He later carried it while patrolling past the "guest house" where Teri and Kim were being held. |

|
"6:00am-7:00am" | Another guard at the Gaines compound carried an M16 when taking Teri to see Gaines. |

|
"8:00am-9:00am" "10:00am-11:00am" "11:00am-12:00pm" |
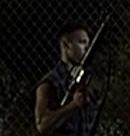
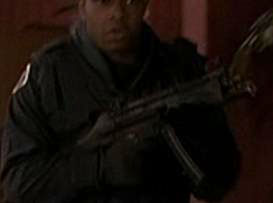
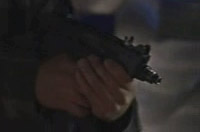
Gaines' thug carried an M16 when patrolling near to Kim and Teri's "guest house". He also held it while Andre Drazen entered the compound. |
Colt M4A1[]
- Main section: Colt M4A1
| Image | Episode(s) | Description |
|---|---|---|
|
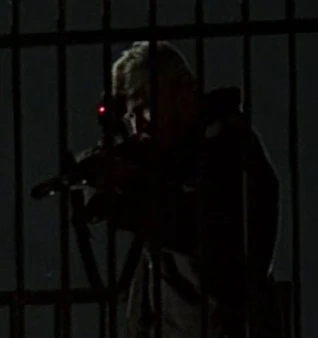
"1:00am-2:00am" | The sniper that killed Richard Walsh fired a Colt M4A1 fitted with a PVS-14 Night Vision Optic. |
Colt XM177[]
- Main section: Colt XM177
| Image | Episode(s) | Description |
|---|---|---|
|
"7:00pm-8:00pm" "8:00pm-9:00pm" |
When preparing for the prisoner transfer at 21911 Kipling Avenue, Mark DeSalvo and Jack Bauer armed themselves with Colt XM177s. After the prisoner was received, Jack switched back to his SIG Sauer P228, but DeSalvo retained his gun when moving the prisoner out of the facility, keeping it until his capture and death by Andre Drazen. Note: As all XM177s are strictly controlled and hard to adapt for use as props, it is highly likely these guns were M16s fitted with fake flash suppressors. |
Norinco NDM-86[]
- Main section: Norinco NDM-86
| Image | Episode(s) | Description |
|---|---|---|
|
"11:00am-12:00pm" "12:00pm-1:00pm" |
Neil Nagi carried a Norinco NDM-86 rifle as he patrolled the perimeter and used it smash into Kevin Carroll's car. He then carried it while Ira Gaines drove after the Bauer, before Gaines took it off him and used it to shoot out Jack's tires and windows. Gaines kept the rifle to hunt Jack with, until Jack shot him in the hand causing Gaines to discard the weapon. |
Remington 700[]
- Main section: Remington 700
| Image | Episode(s) | Description |
|---|---|---|

|
"1:00am-2:00am" "2:00am-3:00am" |
Jonathan Matijevich took target practice with a Remington 700PSS mounted on an AICS bipod, shooting an egg on a fence several yards distant. He later used the rifle to assassinate Bridgit after she led Ira Gaines to where she had buried Martin Belkin's ID. |
Shotguns[]
Mossberg 500[]
- Main section: Mossberg 500
| Image | Episode(s) | Description |
|---|---|---|
|
"3:00am-4:00am" "4:00am-5:00am" |
Jessie Hampton had a Mossberg 500 shotgun in her patrol car. Another was seen in the car taking Penticoff to the station, which was possibly the same car. |

|
"5:00am-6:00am" "6:00am-7:00am" |
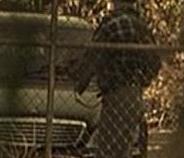
A guard at the Gaines compound carried a Mossberg while patrolling the perimeter. He was still carrying it when he almost discovered Kim Bauer and Rick Allen escaping through the fence. |
|
"5:00am-6:00am" | Another guard at the compound carried a Mossberg shotgun. |
|
"9:00am-10:00am" | The police car that pulled Jack over to the side of the road had a Mossberg 500 in the front. |

|
"1:00pm-2:00pm" | One of the survivors of the compound carried a Mossberg shotgun until he was blown up by Alexis Drazen. |
Mossberg 590[]
- Main section: Mossberg 590
| Image | Episode(s) | Description |
|---|---|---|

|
"6:00pm-7:00pm" | To rip off the ecstasy dealers, Frank Allard called his "friends," who brought him a Mossberg 590 Compact Cruiser with a pistol grip. Allard used the shotgun to disarm Sam Krugman and his partner, and smashed Krugman in the face, breaking his nose. After SWAT teams entered the house, Krugman took the gun from Frank and used it to control the situation. |
Submachine guns[]
Cobray M-11[]
- Main section: Cobray M-11
| Image | Episode(s) | Description |
|---|---|---|
|
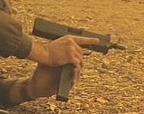
"11:00am-12:00pm" "12:00pm-1:00pm" |
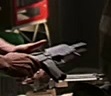
Kevin Carroll used a Cobray M-11 when chasing the Bauer out of the compound. He kept it until he heard the CTU helicopter approaching, and fled the scene. |

|
"11:00am-12:00pm" | One of the men blown up by the van was carrying a Cobray M-11. |
Heckler & Koch MP5[]
- Main section: Heckler & Koch MP5
| Image | Episode(s) | Description |
|---|---|---|
|
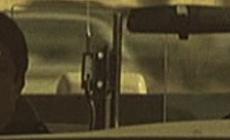
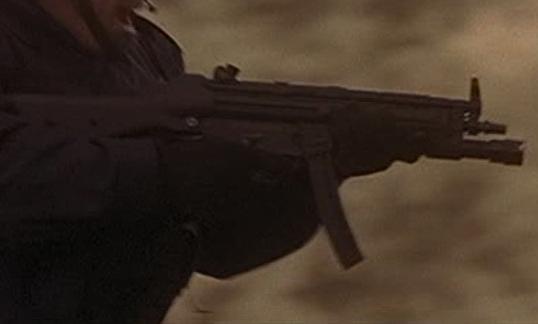
"5:00am-6:00am" "11:00am-12:00pm" "12:00pm-1:00pm" |
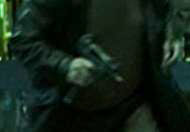
Gaines' thug carried an MP5 when taking Kim Bauer to see Ira Gaines. He later had it when guarding the front gate, and then arrived at the burnt-out van with it. |

|
"6:00am-7:00am" | A guard held an MP5 while watching Teri Bauer being taken to Ira Gaines. |

|
"11:00am-12:00pm" "12:00pm-1:00pm" |
A compound guard had an MP5 during the firefight with Jack Bauer at the van. He held it as they investigated the aftermath of the explosion. |
|
"12:00pm-1:00pm" "1:00pm-2:00pm" |
Bundy and the other 5 CTU agents that picked up the Bauer family carried MP5A2s, which they kept on the ride back to the CTU Los Angeles building. |

|
"1:00pm-2:00pm" | Two of the survivors of the Gaines compound carried MP5s before being blown up by Alexis Drazen. |
|
"4:00pm-5:00pm" | The CTU SWAT team that provided backup on the Elizabeth Nash sting operation carried MP5s. |

|
"6:00pm-7:00pm" | Some of the SWAT team members that invaded 1804 Glade in the drug deal sting operation carried MP5s. |

|
"7:00pm-8:00pm" "8:00pm-9:00pm" |
All of the staff at 21911 Kipling Avenue, except Mark DeSalvo, were fitted with MP5A2s when receiving and transferring their prisoner. |

|
"8:00pm-9:00pm" | Barnes, Drake and the other CTU agents that investigated 21911 Kipling Avenue all carried MP5A2s. |
IMI Uzi[]
- Main section: IMI Uzi
| Image | Episode(s) | Description |
|---|---|---|
|
"11:00am-12:00pm" | A guard at the Gaines compound carried an Uzi, and was seen by Teri Bauer as he patrolled near the "guest house". |

|
"11:00am-12:00pm" | Jack Bauer noticed a lookout with an Uzi watching over the men loading boxes into the vans. |
|
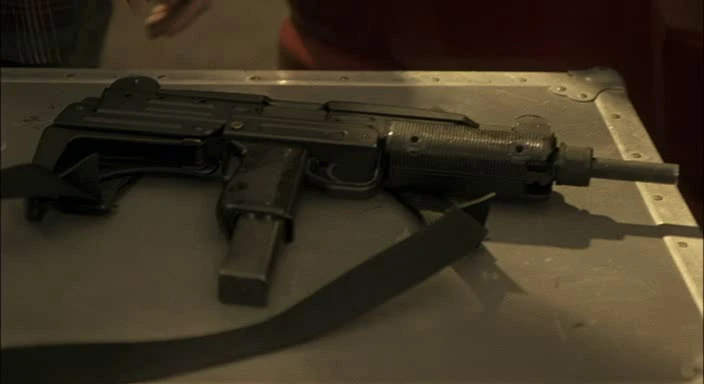
"11:00am-12:00pm" | Rick Allen stole an unattended IMI Uzi before taking one of Ira Gaines' vans. Later, he used it to assist Jack Bauer in the firefight against the pursuing mercenaries, and Jack himself used it to shoot and ignite the van's leaking fuel line, causing an explosion that killed two of their attackers. |
|
"11:00am-12:00pm" "12:00pm-1:00pm" |
One of the guards at the gate of the Gaines compound carried an Uzi, using it to shoot at Jack as he tried to escape. Later, the man arrived at the scene of the burnt out van carrying the same weapon. |

|
"11:00am-12:00pm" | One of the men that was blown up by the van explosion carried an Uzi. |
|
"6:00pm-7:00pm" | Craig, one of Frank Allard's friends, used a Micro Uzi during the drug deal at Rick's house. |
|
"7:00pm-8:00pm" | One of Harris's mercenaries carried an Uzi when staking out 21911 Kipling Avenue. |
|
"11:00pm-12:00am" | Serge carried a Micro Uzi just before the shootout at Dock 11A. |
Škorpion vz. 61[]
- Main section: Škorpion vz. 61
| Image | Episode(s) | Description |
|---|---|---|

|
"11:00pm-12:00am" | Marko fired a Škorpion vz. 61 at Jack Bauer when he drove the van into the warehouse at the Port. |

|
"11:00pm-12:00am" | Another of Drazen's men fired a Škorpion at Jack's approaching van, shooting through a pane of glass. |
Steyr SPP[]
- Main section: Steyr SPP
| Image | Episode(s) | Description |
|---|---|---|
|
"6:00pm-7:00pm" | At 1804 Glade, the accomplice of Frank Allard and Craig (played by Henry M. Kingi, Jr.) armed himself a Steyr SPP before the drug deal. During the deal he held the female undercover cop at gunpoint with the weapon, however after the DEA burst in it changed to a Glock 17. |
Other guns[]
Advanced Taser M26[]
- Main section: Advanced Taser M26
| Image | Episode(s) | Description |
|---|---|---|
|
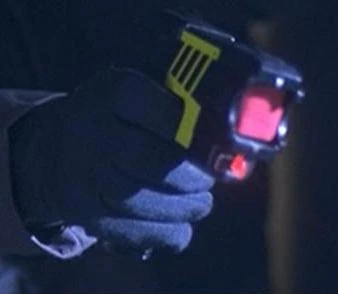
"7:00pm-8:00pm" | When Jack Bauer was investigating 21911 Kipling Avenue, a guard hit him with an M26 Advanced Taser, rendering him unconscious. |
Heckler & Koch P2A1[]
- Main section: Heckler & Koch P2A1
| Image | Episode(s) | Description |
|---|---|---|
|
"3:00pm-4:00pm" | When invading the 23033 Pine Canyon safe house, Jovan Myovic killed Jeff Breeher with a bolt loaded into a Heckler & Koch P2A1 flare gun. |
Palmer Cap-Chur Short Range Projector[]
- Main section: Palmer Cap-Chur Short Range Projector
| Image | Episode(s) | Description |
|---|---|---|
|
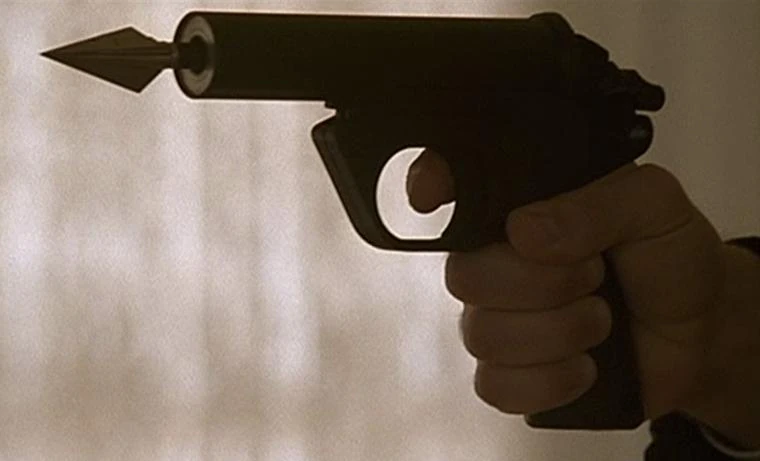
"12:00am-1:00am" | When George Mason refused to give up the name of the source of the David Palmer assassination intel, Jack Bauer went out of his office and downstairs to a cupboard. He got a Palmer Cap-Chur tranquilizer pistol and concealed it in a binder, before going back to his office and shooting Mason in the leg. |
Stun gun[]
- Main section: Stun gun
| Image | Episode(s) | Description |
|---|---|---|

|
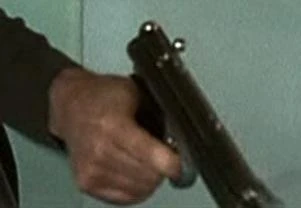
"11:00pm-12:00am" | Nina Myers used a stun gun during her murder of Jamey Farrell. |
Knives[]
Benchmade 259s[]
- Main section: Benchmade 259s
| Image | Episode(s) | Description |
|---|---|---|
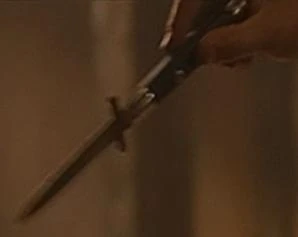
|
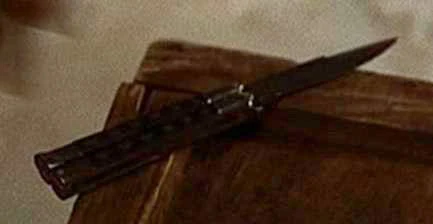
"2:00am-3:00am" | Larry Rogow had a Benchmade 259s balisong knife in his living quarters, and picked it up to threaten Kim Bauer and Janet York as he told them to leave. |
Benchmade 2550 Mini-reflex[]
- Main section: Benchmade 2550 Mini-reflex
| Image | Episode(s) | Description |
|---|---|---|
|
"1:00am-2:00am" "9:00am-10:00am" "10:00am-11:00am" "11:00am-12:00pm" |
Jack Bauer carried this TAC folder during the first half of day one. He had it at 2350 Dunlop Plaza to cut off an assassin's thumb, and later used it at a car park to break into a car. He then used it when tying up Kevin Carroll at the Nordhoff garage, and later when untying him at the Gaines compound. |
Microtech HALO[]
- Main section: Microtech HALO
| Image | Episode(s) | Description |
|---|---|---|

|
"10:00am-11:00am" "11:00am-12:00pm" "11:00pm-12:00am" |
Ted Cofell had a Microtech HALO knife concealed in the armrest of his limousine. After being captured by Jack Bauer, he drew the knife and attacked Jack with it. Jack disarmed killed him, taking the knife for himself. Later, he used it to sever the fuel line on a van when escaping the Gaines compound, allowing him to shoot and detonate the van. He kept the knife throughout the day and used it to cut his wife out of her bindings once he found her dead. |
Milano Stiletto[]
- Main section: Milano Stiletto
| Image | Episode(s) | Description |
|---|---|---|
|
"10:00am-11:00am" "11:00am-12:00pm" |
Eli Stram carried a Milano Stiletto switchblade, drawing it after being disarmed by Teri and Kim Bauer. He was shot before using it, and Kim took it as a defensive weapon. She drew the blade when she heard her father approaching their building, but Jack left the blade with Eli's corpse when the family escaped. |
Explosives[]
Bomb[]
- Main section: Bomb
| Image | Episode(s) | Description |
|---|---|---|
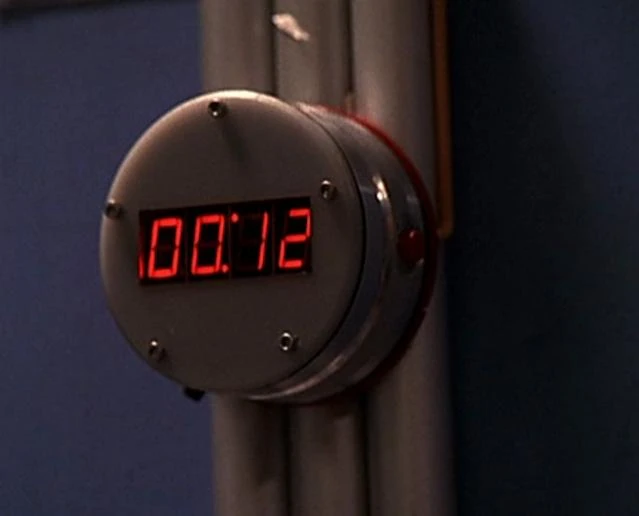
|
"12:00am-1:00am" | Mandy extracted an explosive device from a fire extinguisher aboard Flight 221, before sticking it on a bin and blowing the plane up. It looked like several pipe bombs hooked up to a timer display. |
C-4 explosive[]
- Main section: C-4 explosive
| Image | Episode(s) | Description |
|---|---|---|

|
"7:00pm-8:00pm" "8:00pm-9:00pm" |
Harris's men loaded C-4 explosive into their bags while staking out 21911 Kipling Avenue. Later, they used it to collapse a corridor inside the facility, before leaving it to booby trap their escape to stop Drake and his team following them. |
Primer cord[]
- Main section: Primer cord
| Image | Episode(s) | Description |
|---|---|---|
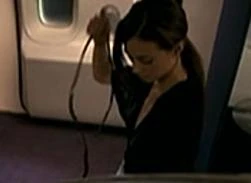
|
"12:00am-1:00am" | Mandy used a length of primer cord to wrap around the door of Flight 221, before using a silver detonator to blow the door away. She then parachuted out of the plane to safety. |